
In this post, we will take a look at how we can send real-time notifications with Laravel, the Laravel Websockets package, and Laravel Echo.
HTTP is stateless. Usually, the client asks for a URL, and the server returns the data. Only a refresh of the page can load new information. Most of the time, this is enough, but sometimes we need more.
Today, many tasks happen on the backend, and we sometimes need to inform the user about it right away. So there is a use-case for triggering an action from the server instead of the client. Think of messaging in a chat or notification messages that pop up on the top of your dashboard.
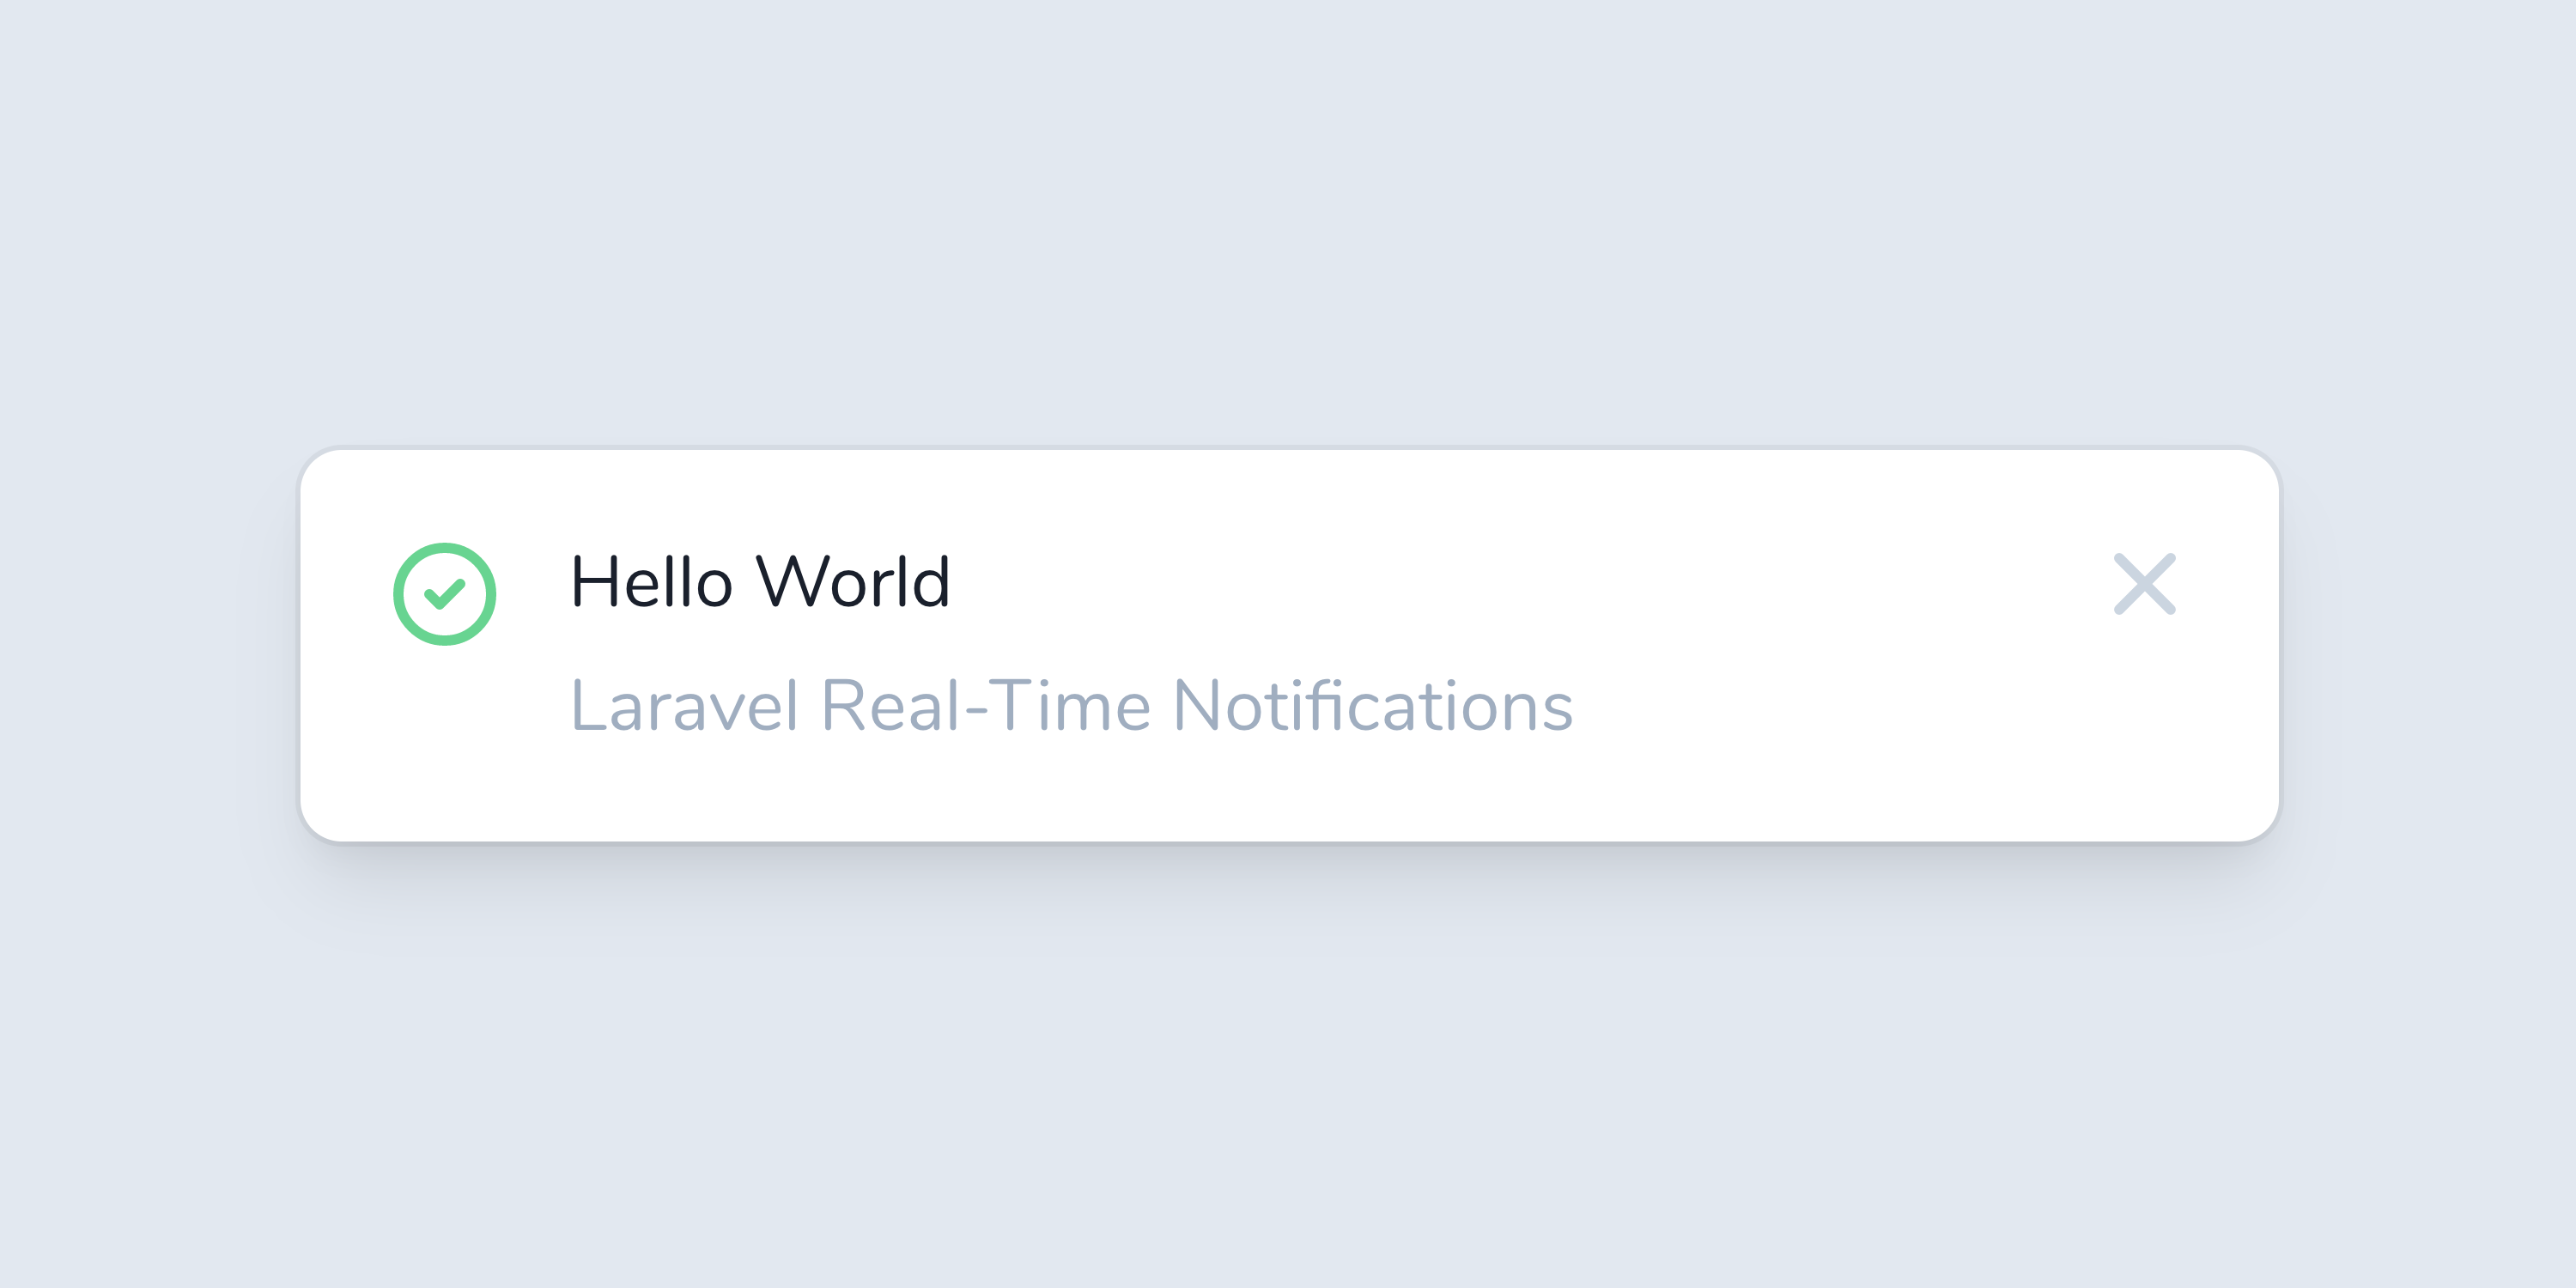
To achieve this, our client could ask the server every second if something new happened, or you could make use of long polling. But the best solution is to create a new communication channel through WebSockets which works in both ways. Today we are going to build an application with real-time messaging. We will use a WebSocket solution called Laravel Websockets, built in PHP. Here is a preview of what we are going to built today: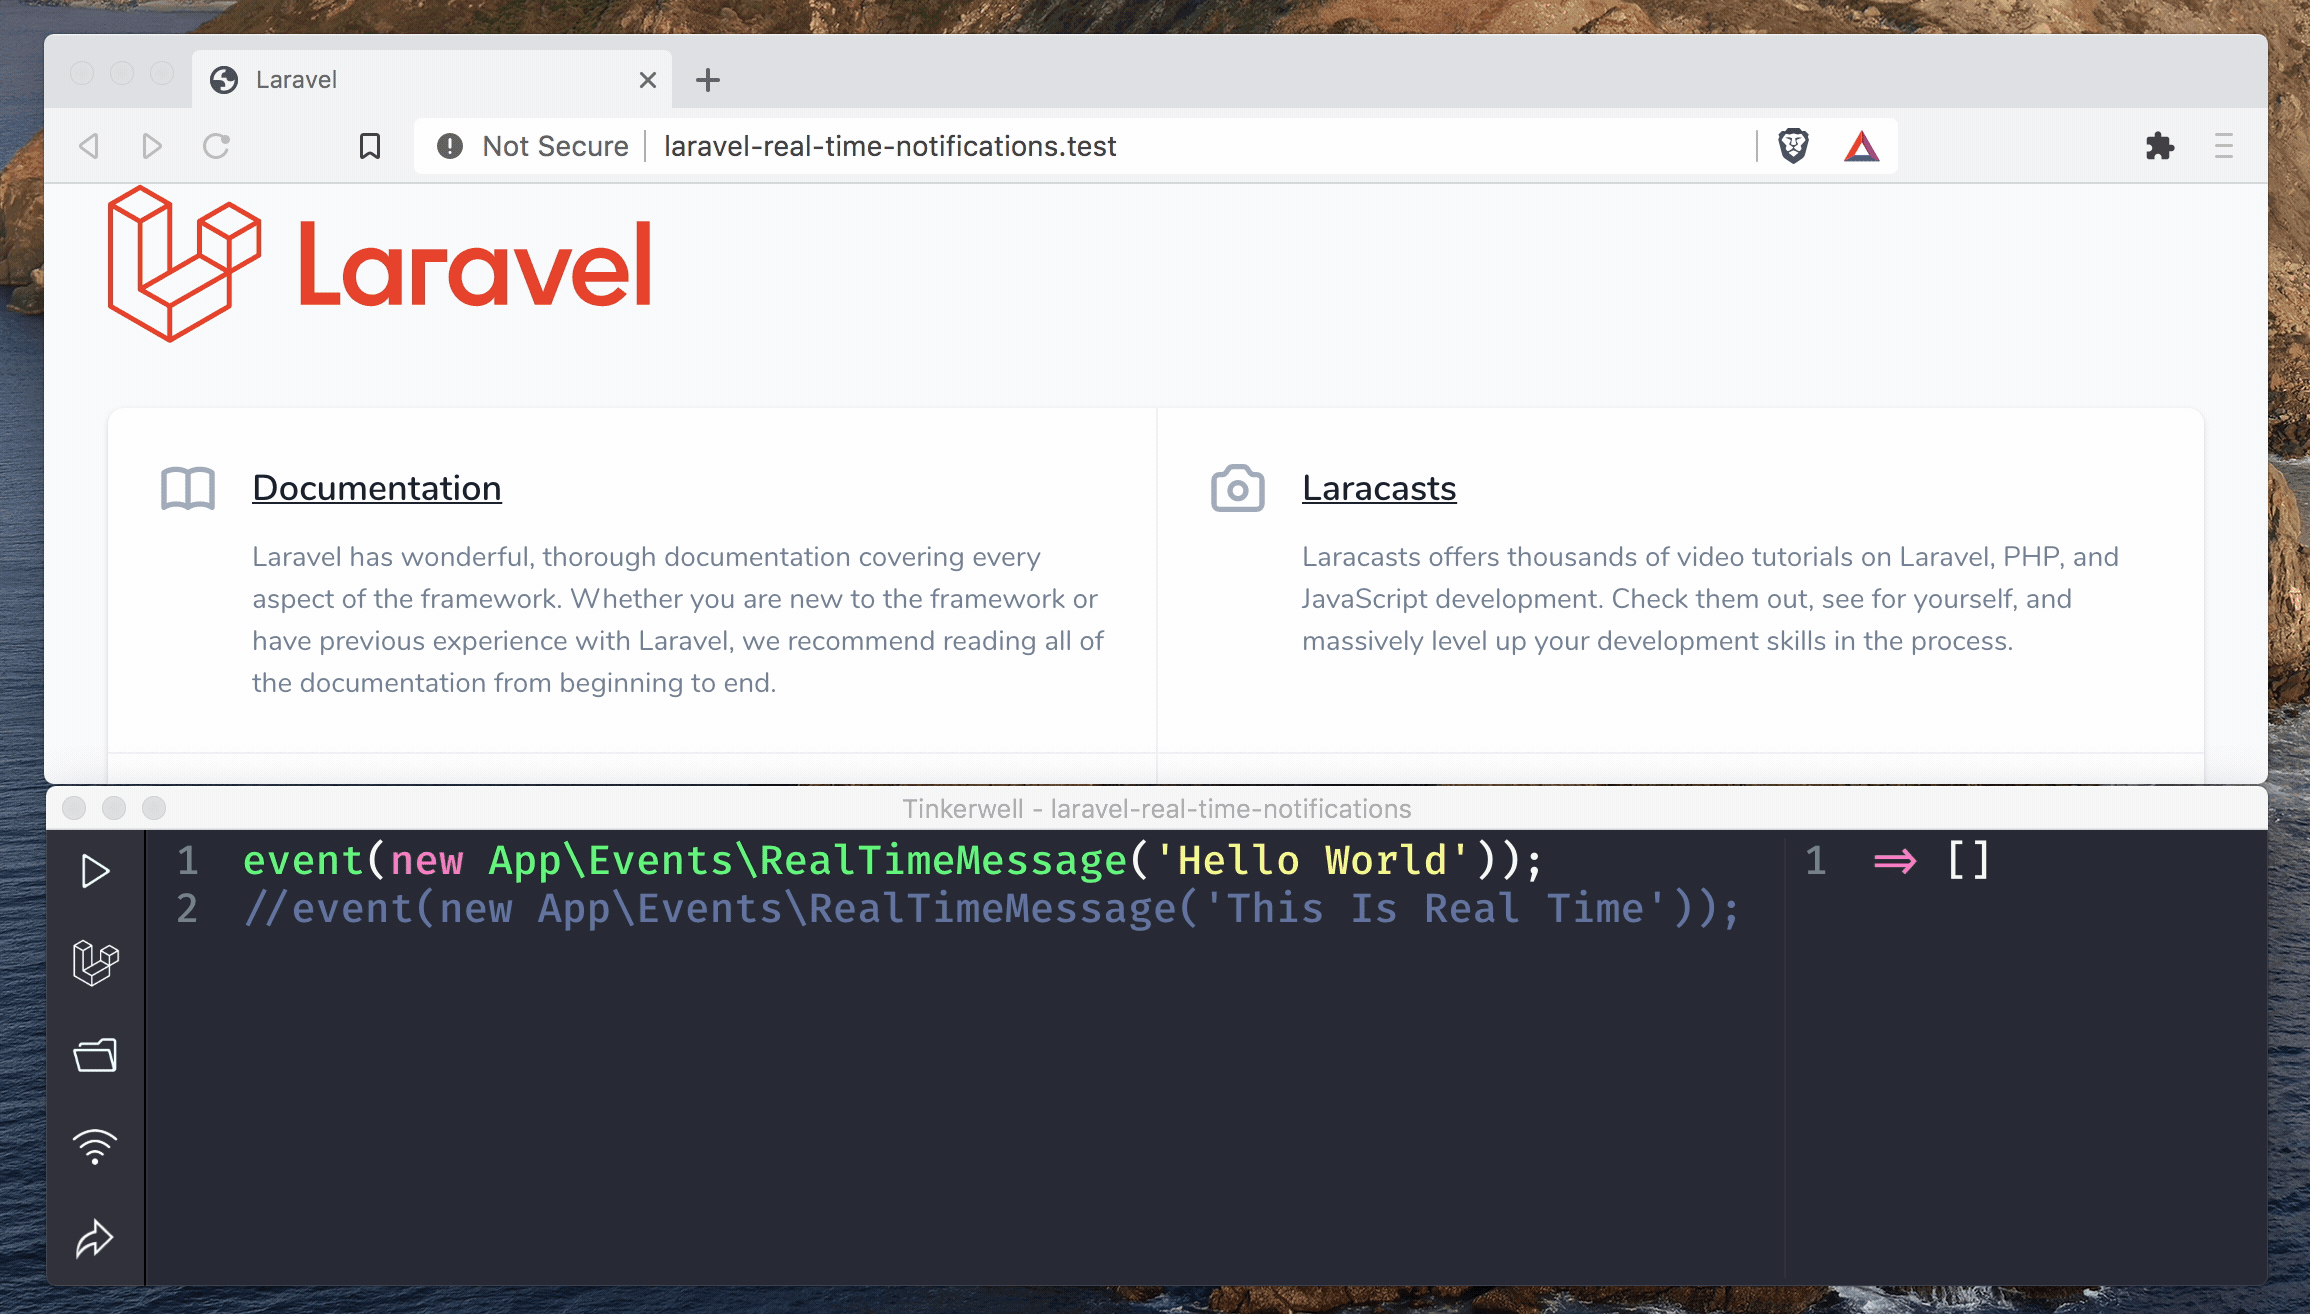
Installation
laravel new laravel-real-time-notifications
- Sending/broadcasting notifications from our Laravel application
- A WebSockets server that receives those notifications
- Our front-end that listens to the WebSockets server
Installing Laravel Websockets
Pusher. Many settings will refer to Pusher today but be reminded that we are not using it. We want our own solution.
composer require beyondcode/laravel-websockets
composer require pusher/pusher-php-server
BROADCAST_DRIVER=pusher
					PUSHER_APP_ID=12345
PUSHER_APP_KEY=12345
PUSHER_APP_SECRET=12345
PUSHER_APP_CLUSTER=mt1
php artisan vendor:publish --provider="BeyondCode\LaravelWebSockets\WebSocketsServiceProvider" --tag="migrations"
php artisan migrate
php artisan vendor:publish --provider="BeyondCode\LaravelWebSockets\WebSocketsServiceProvider" --tag="config"
php artisan websockets:serve
Broadcast Notifications From Our Laravel Application
- Laravel Events
- Laravel Notifications
We will start with events because this is a little easier. Later we will check notifications as well.
Let’s create a new event with artisan.
php artisan make:event RealTimeMessage
- use the ShouldBroadcast interface
- add a message property which we will pass through the constructor
- return a new Channel instead of a PrivateChannel
- give the channel the name events instead of channel-name
					<?php

namespace App\Events;

use Illuminate\Broadcasting\Channel;
use Illuminate\Contracts\Broadcasting\ShouldBroadcast;
use Illuminate\Queue\SerializesModels;

class RealTimeMessage implements ShouldBroadcast
{
    use SerializesModels;

    public string $message;

    public function __construct(string $message)
    {
        $this->message = $message;
    }

    public function broadcastOn(): Channel
    {
        return new Channel('events');
    }
}
					'options' => [
    'cluster' => env('PUSHER_APP_CLUSTER'),
    'encrypted' => false,
    'host' => '127.0.0.1',
    'port' => 6001,
    'scheme' => 'http'
],
Note: We do not use TLS for our demo, but we will take a look at that later as well.
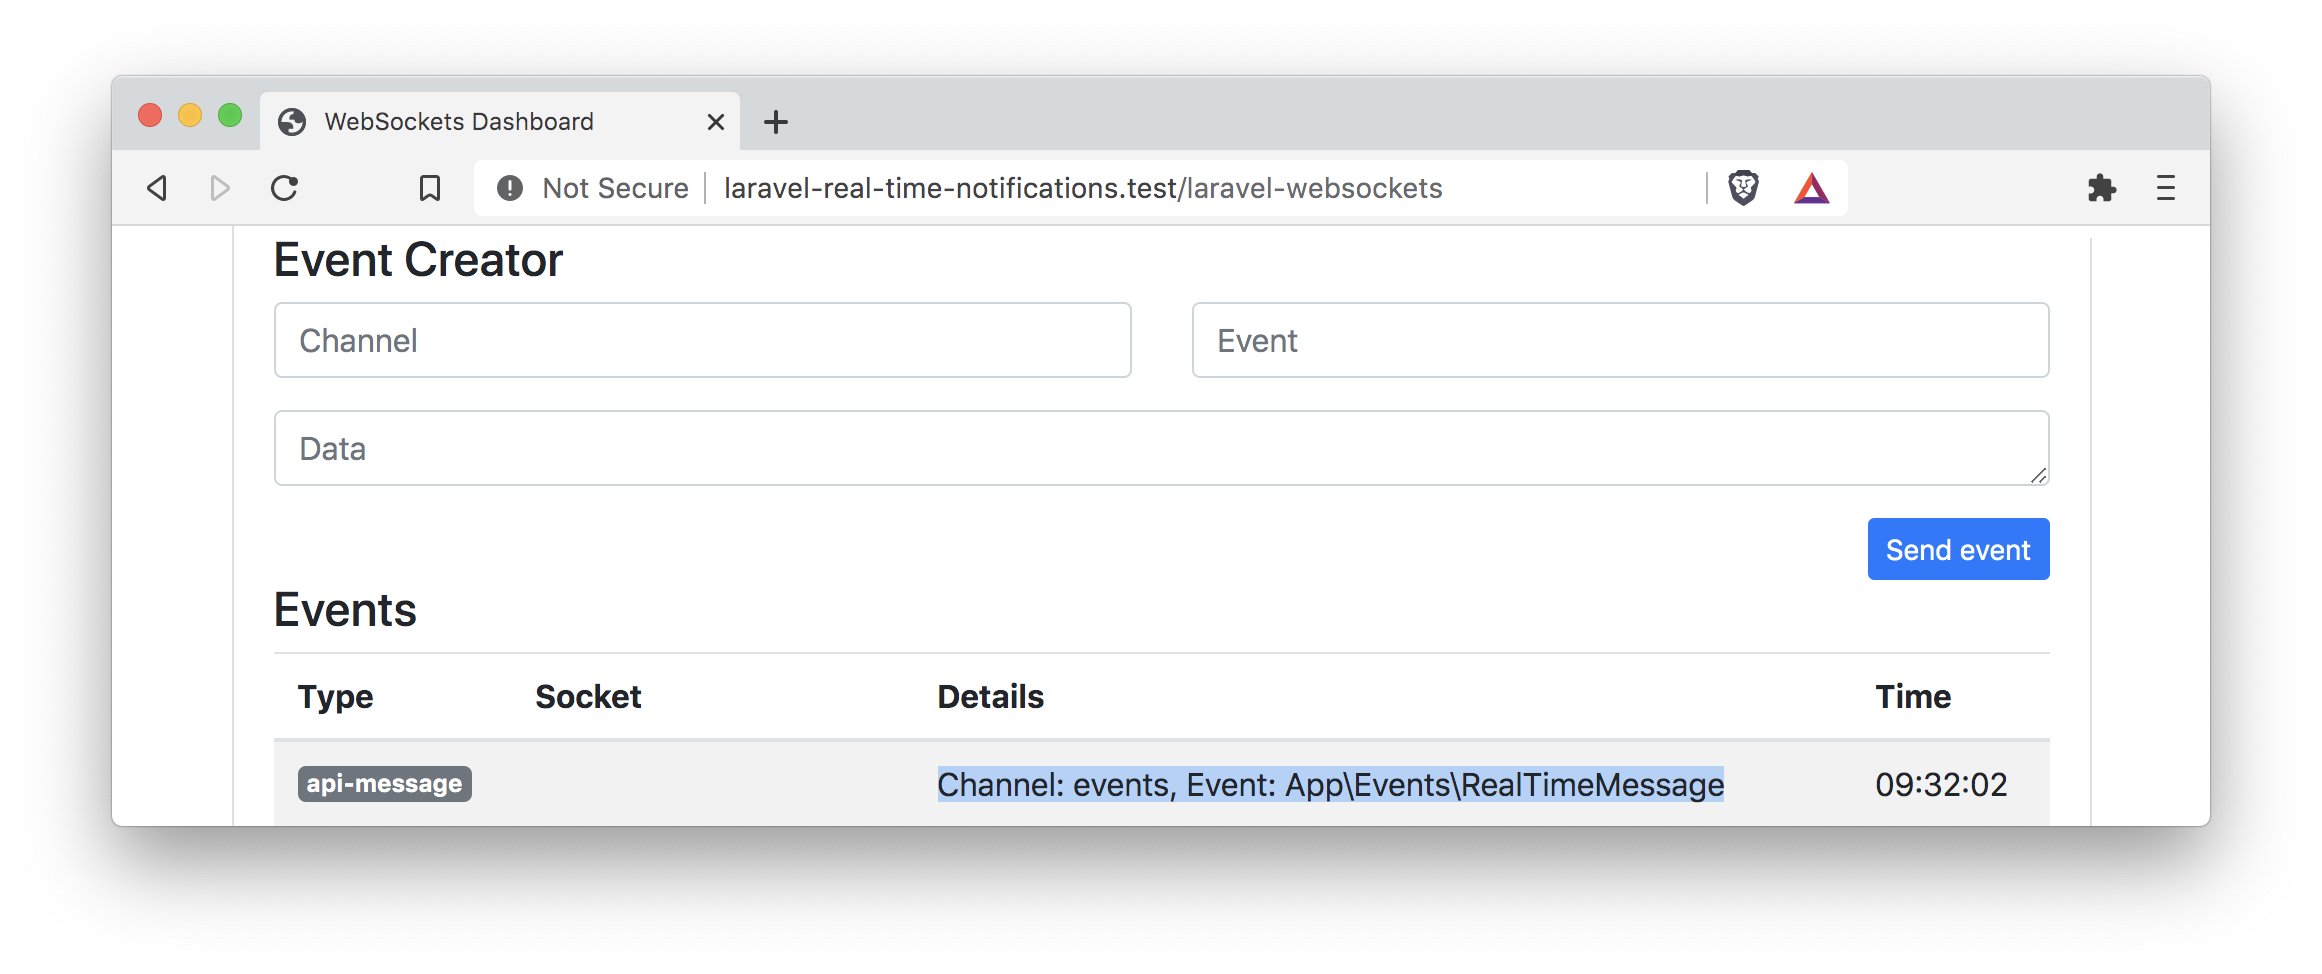
event(new App\Events\RealTimeMessage('Hello World'));
Listen To Messages From Our Front-end
npm install --save-dev laravel-echo pusher-js
					import Echo from 'laravel-echo';

window.Pusher = require('pusher-js');

window.Echo = new Echo({
    broadcaster: 'pusher',
    key: process.env.MIX_PUSHER_APP_KEY,
    cluster: process.env.MIX_PUSHER_APP_CLUSTER,
    forceTLS: false,
    wsHost: window.location.hostname,
    wsPort: 6001,
});
<script src="{{ asset('js/app.js') }}"></script>
<script>
Echo.channel('events')
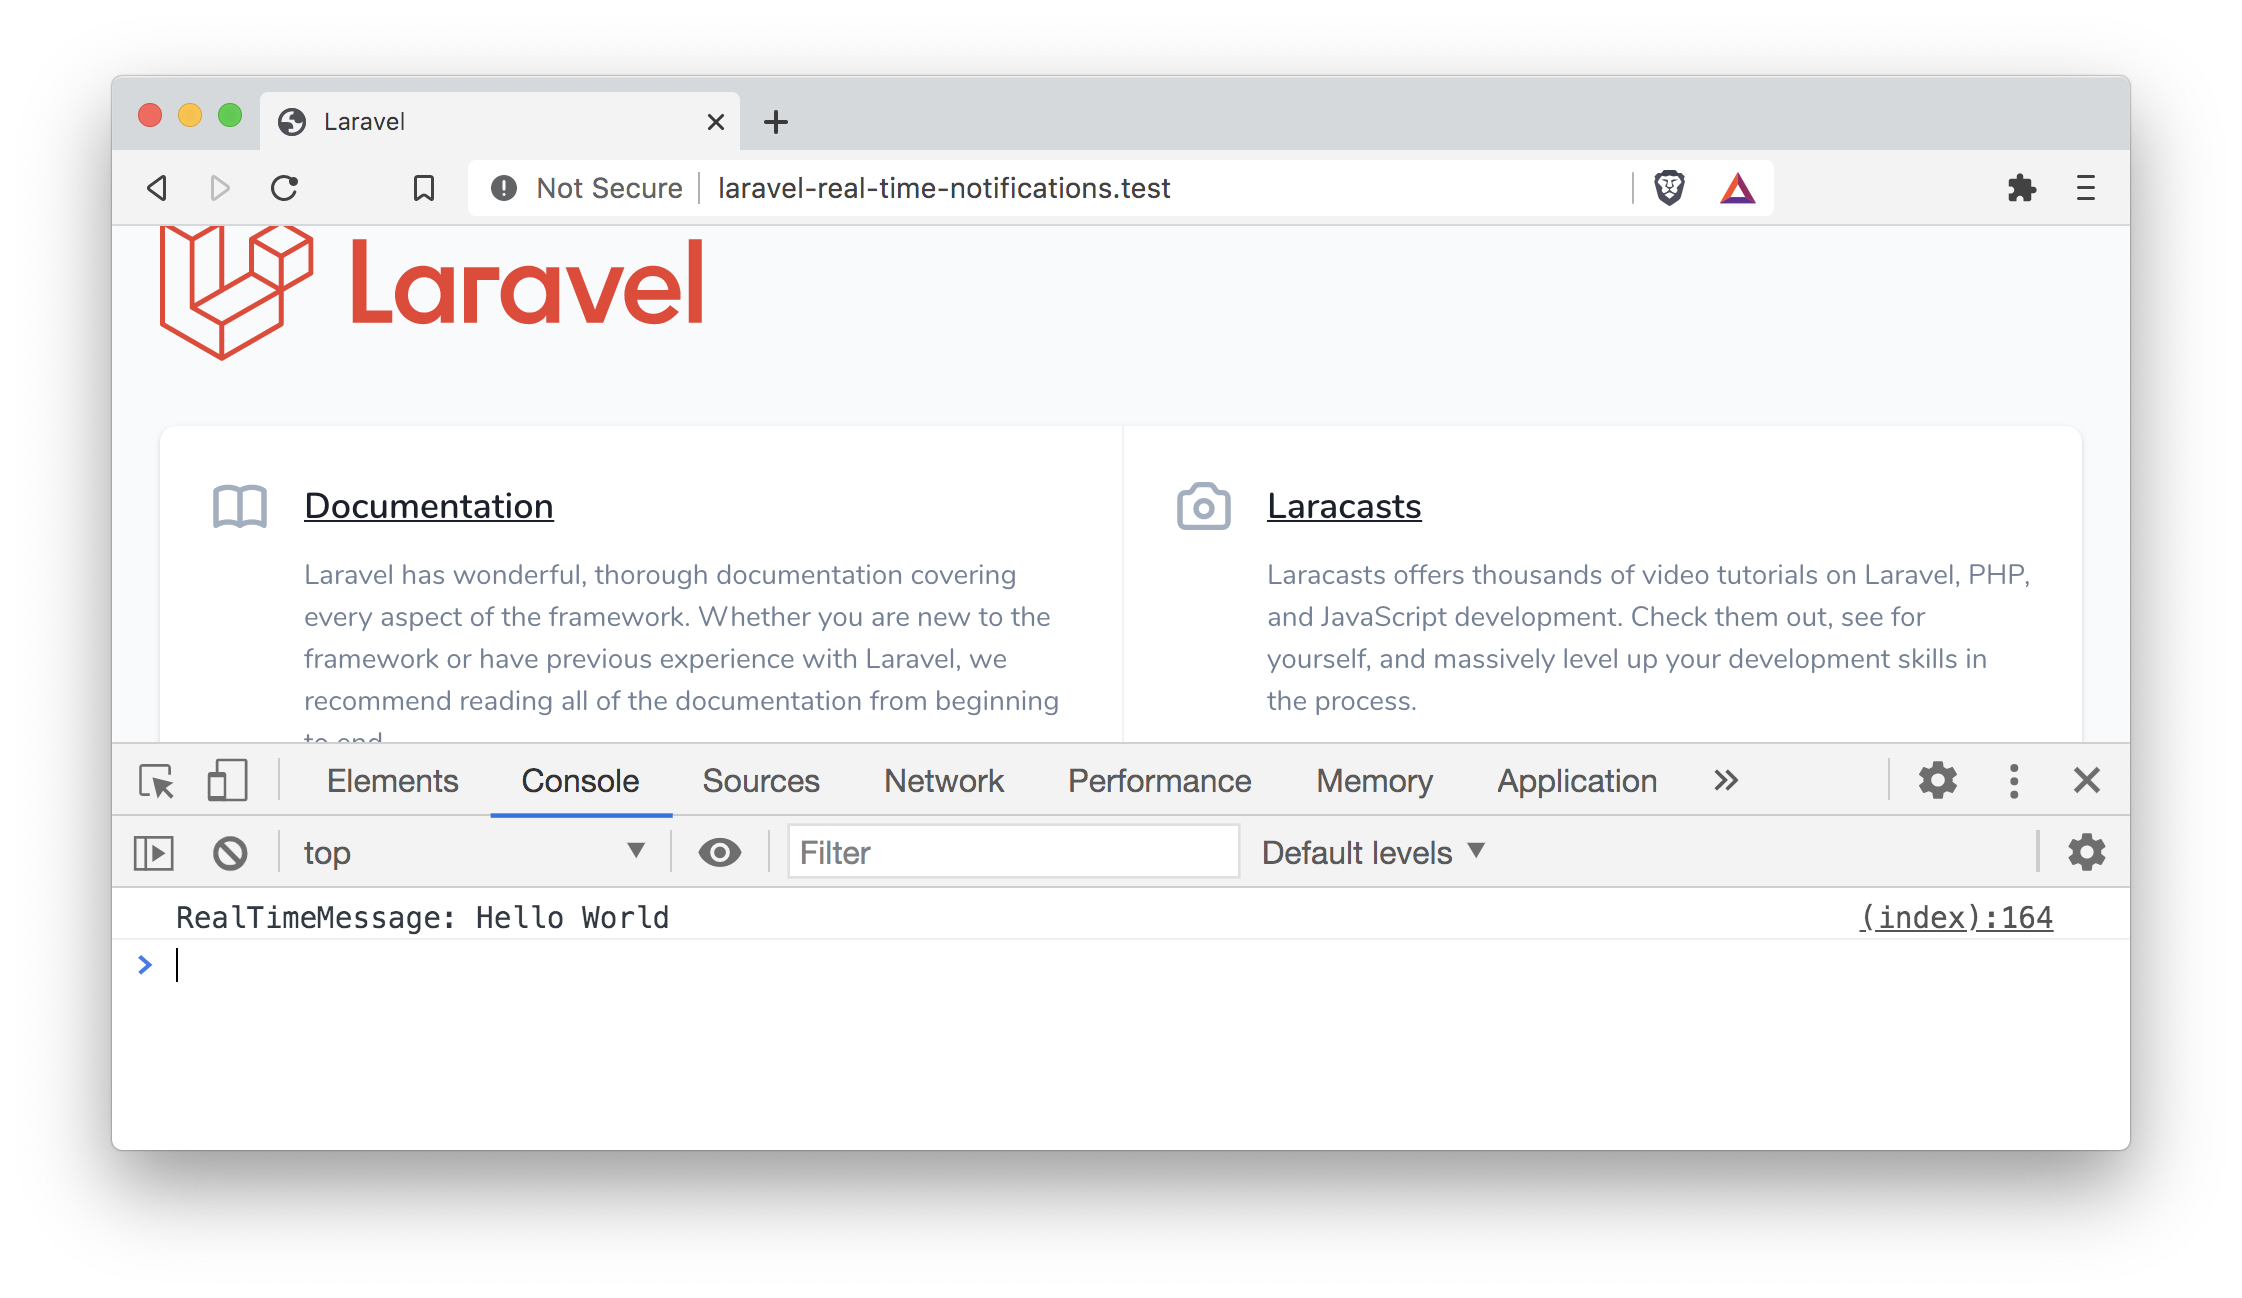
.listen('RealTimeMessage', (e) => console.log('RealTimeMessage: ' + e.message));
</script>
Sending Real-Time Messages
event(new App\Events\RealTimeMessage('Hello World'));
Let's Talk Privately
					public function broadcastOn(): Channel
{
    return new PrivateChannel('events');
}
Now send the event again.
Note: If you are using Laravel Tinker, make sure to restart it because of the changes we made in our event.
					Echo.private('events')
    .listen('RealTimeMessage', (e) => console.log('Private RealTimeMessage: ' + e.message));
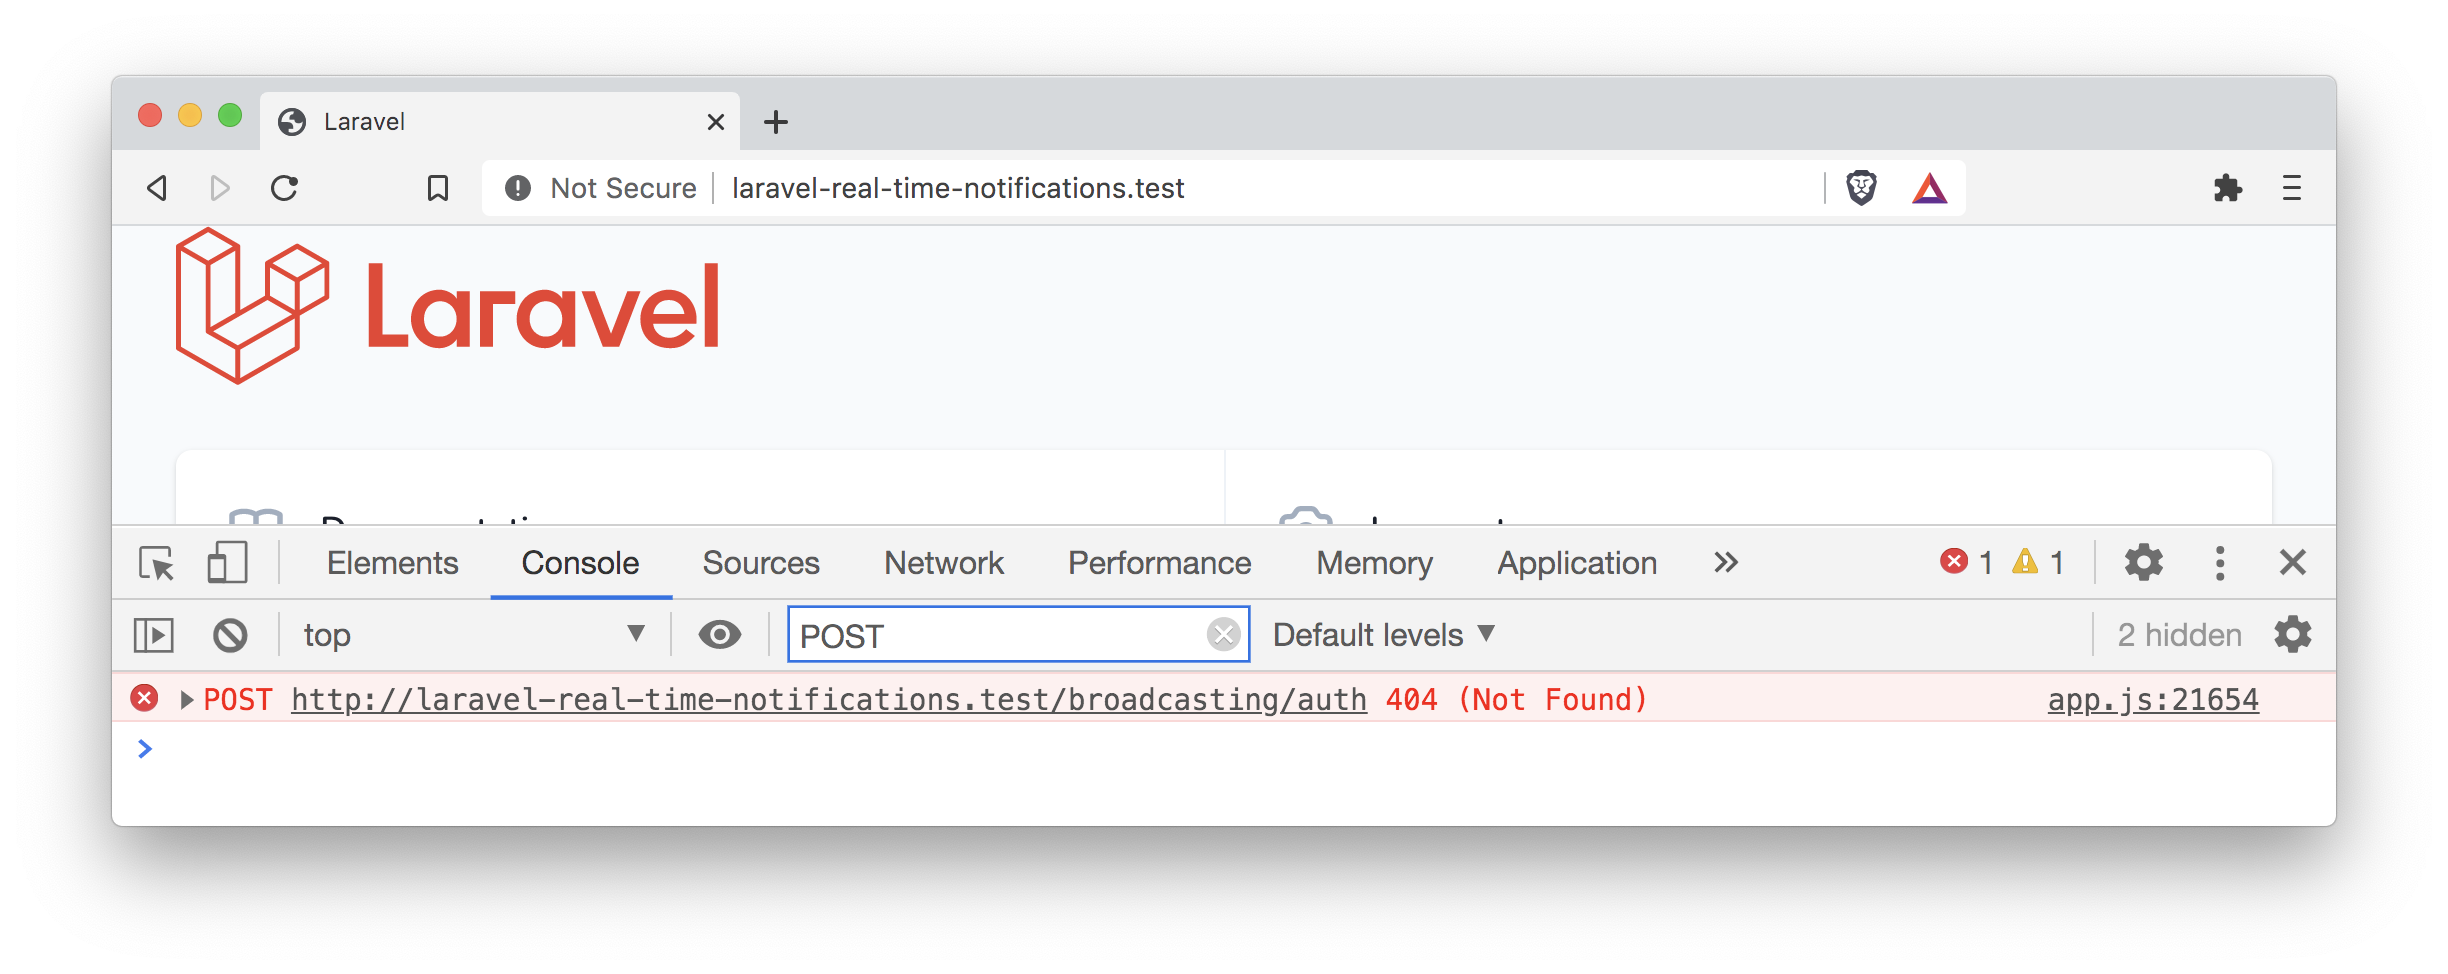
But when you refresh the welcome page, you see that we get an error.
					/*
 * Application Service Providers...
 */
App\Providers\AppServiceProvider::class,
App\Providers\AuthServiceProvider::class,
App\Providers\BroadcastServiceProvider::class, // We enabled this class
App\Providers\EventServiceProvider::class,
App\Providers\RouteServiceProvider::class,

<meta name="csrf-token" content="{{ csrf_token() }}">
Again we were able to solve a problem, and also we see a new error. But trust me, we are getting close now 🙂
					Broadcast::channel('events', function ($user) {
    return true;
});
					User::create([
    'name' => 'Test user',
    'email' => 'test@test.at',
    'password' => bcrypt('test'),
]);
					Route::get('/', function () {
    auth()->login(User::first());

    return view('welcome');
});
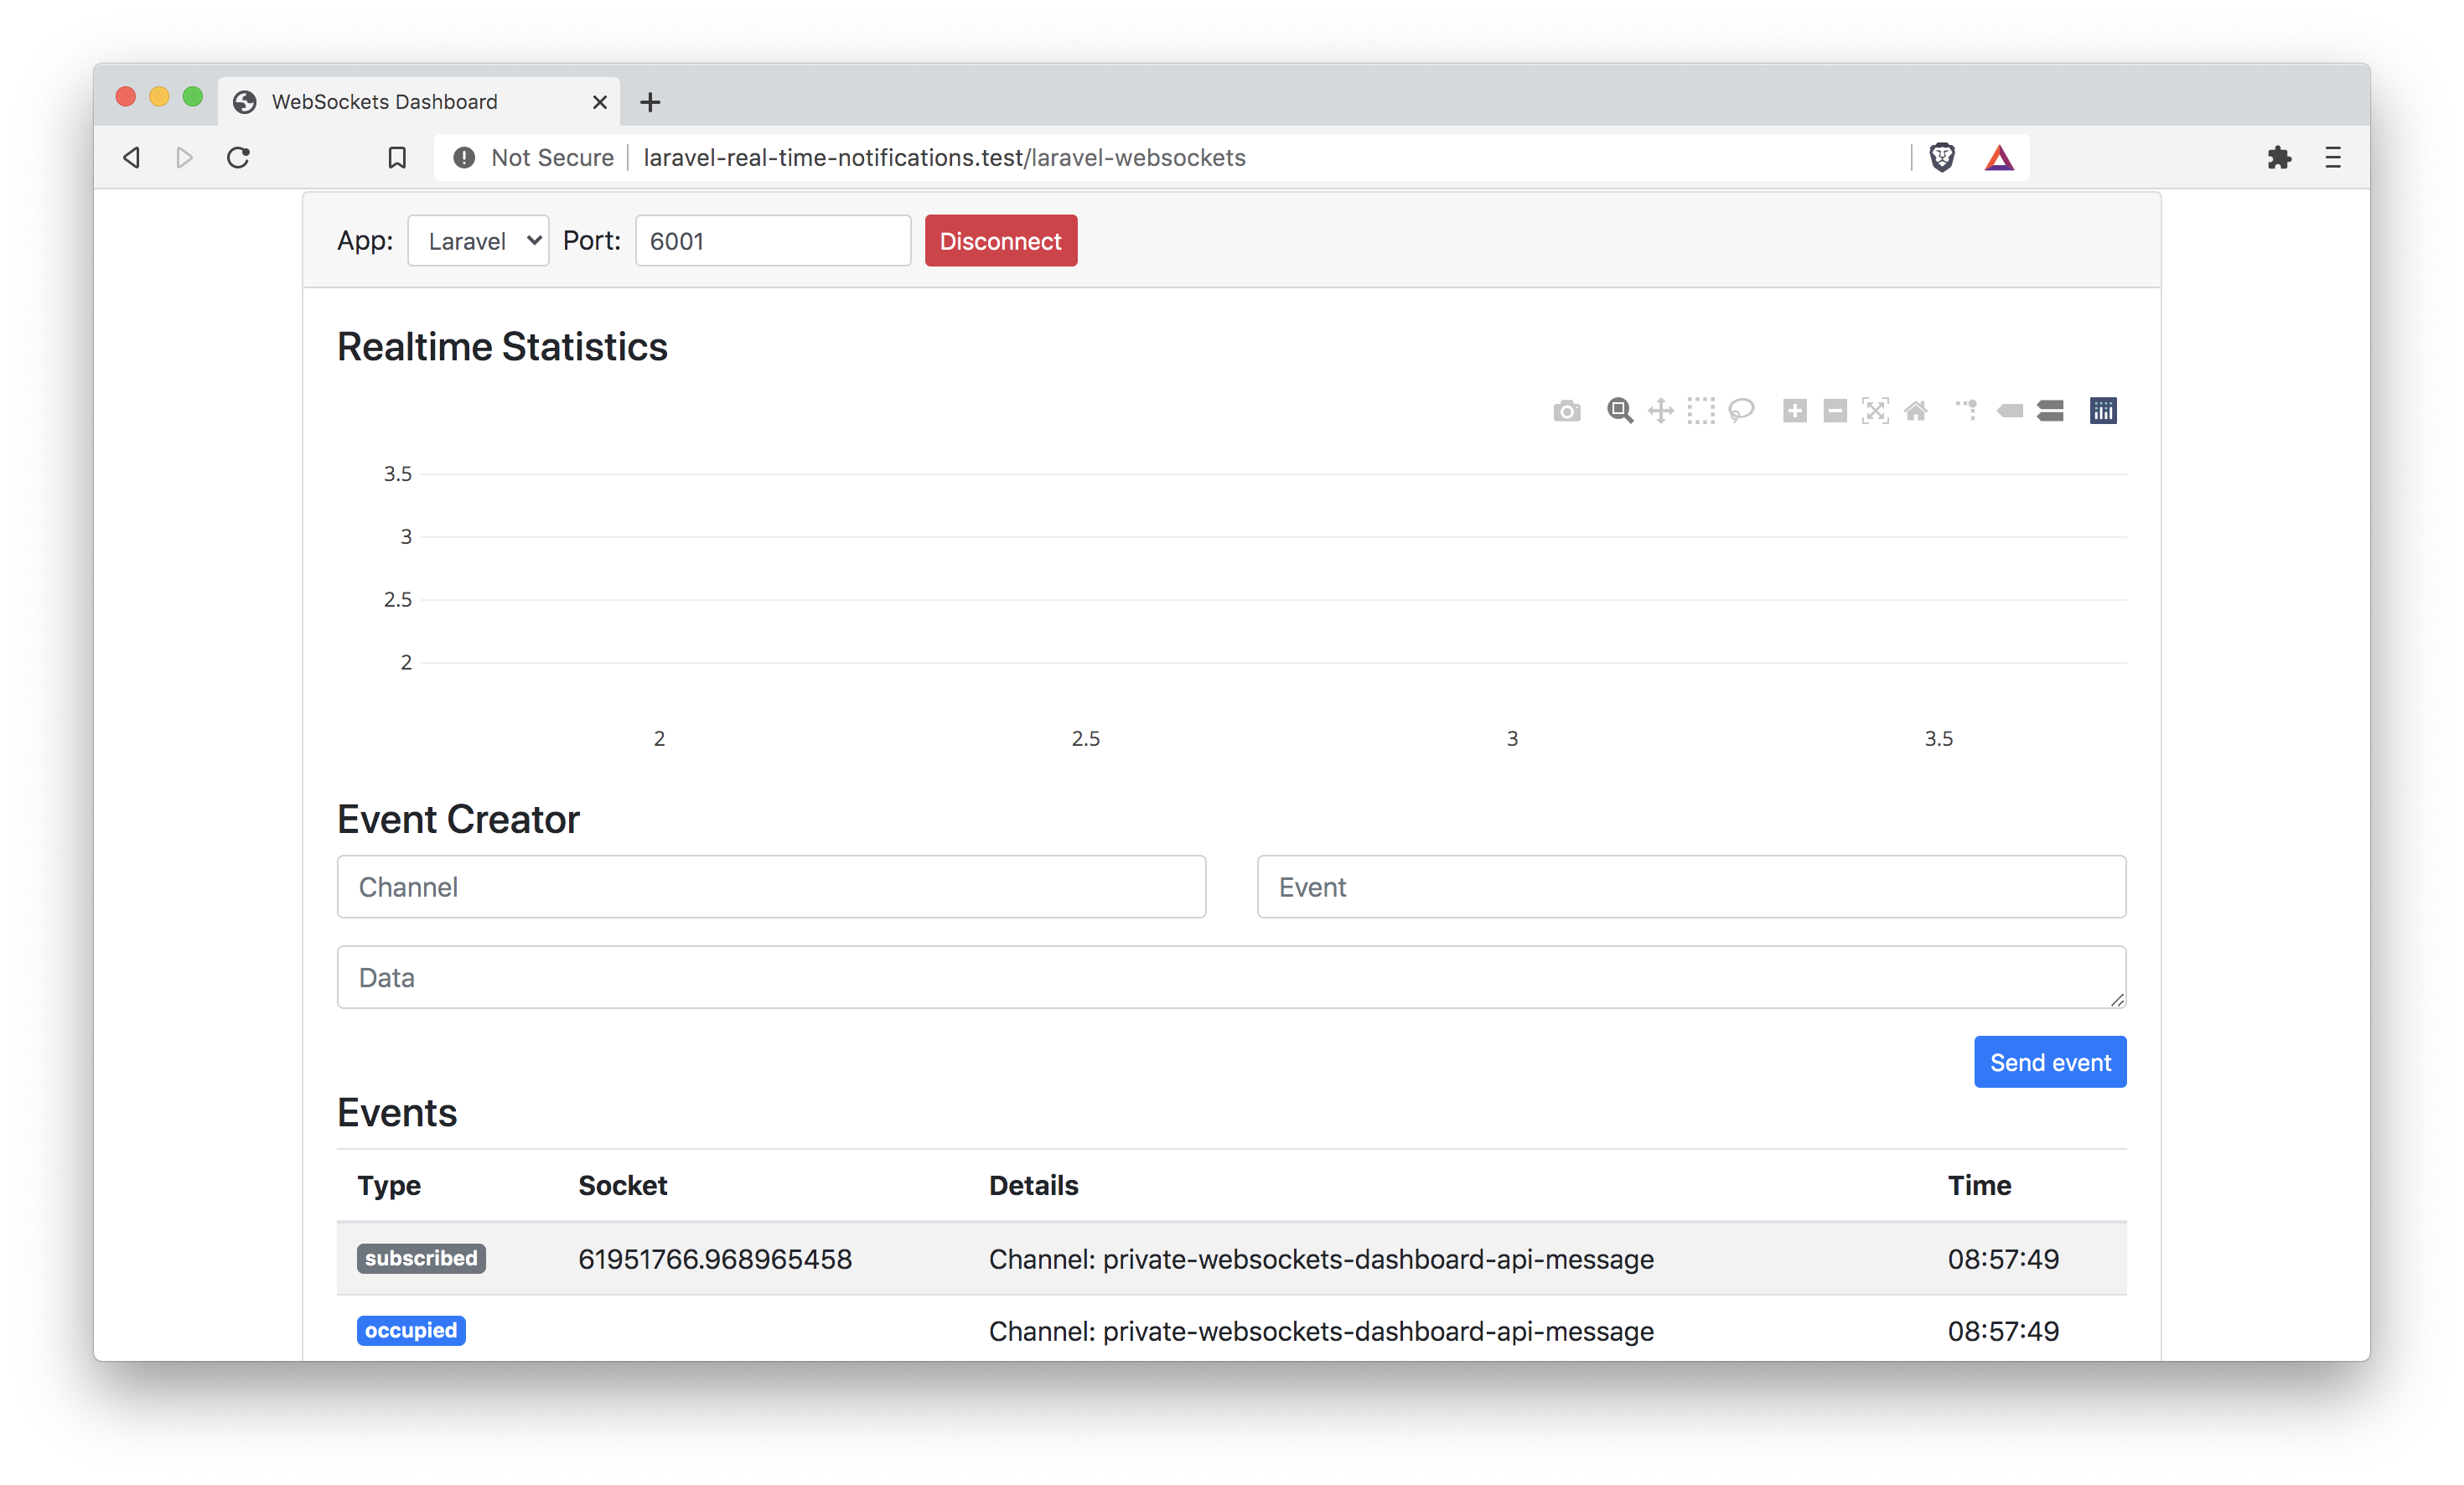
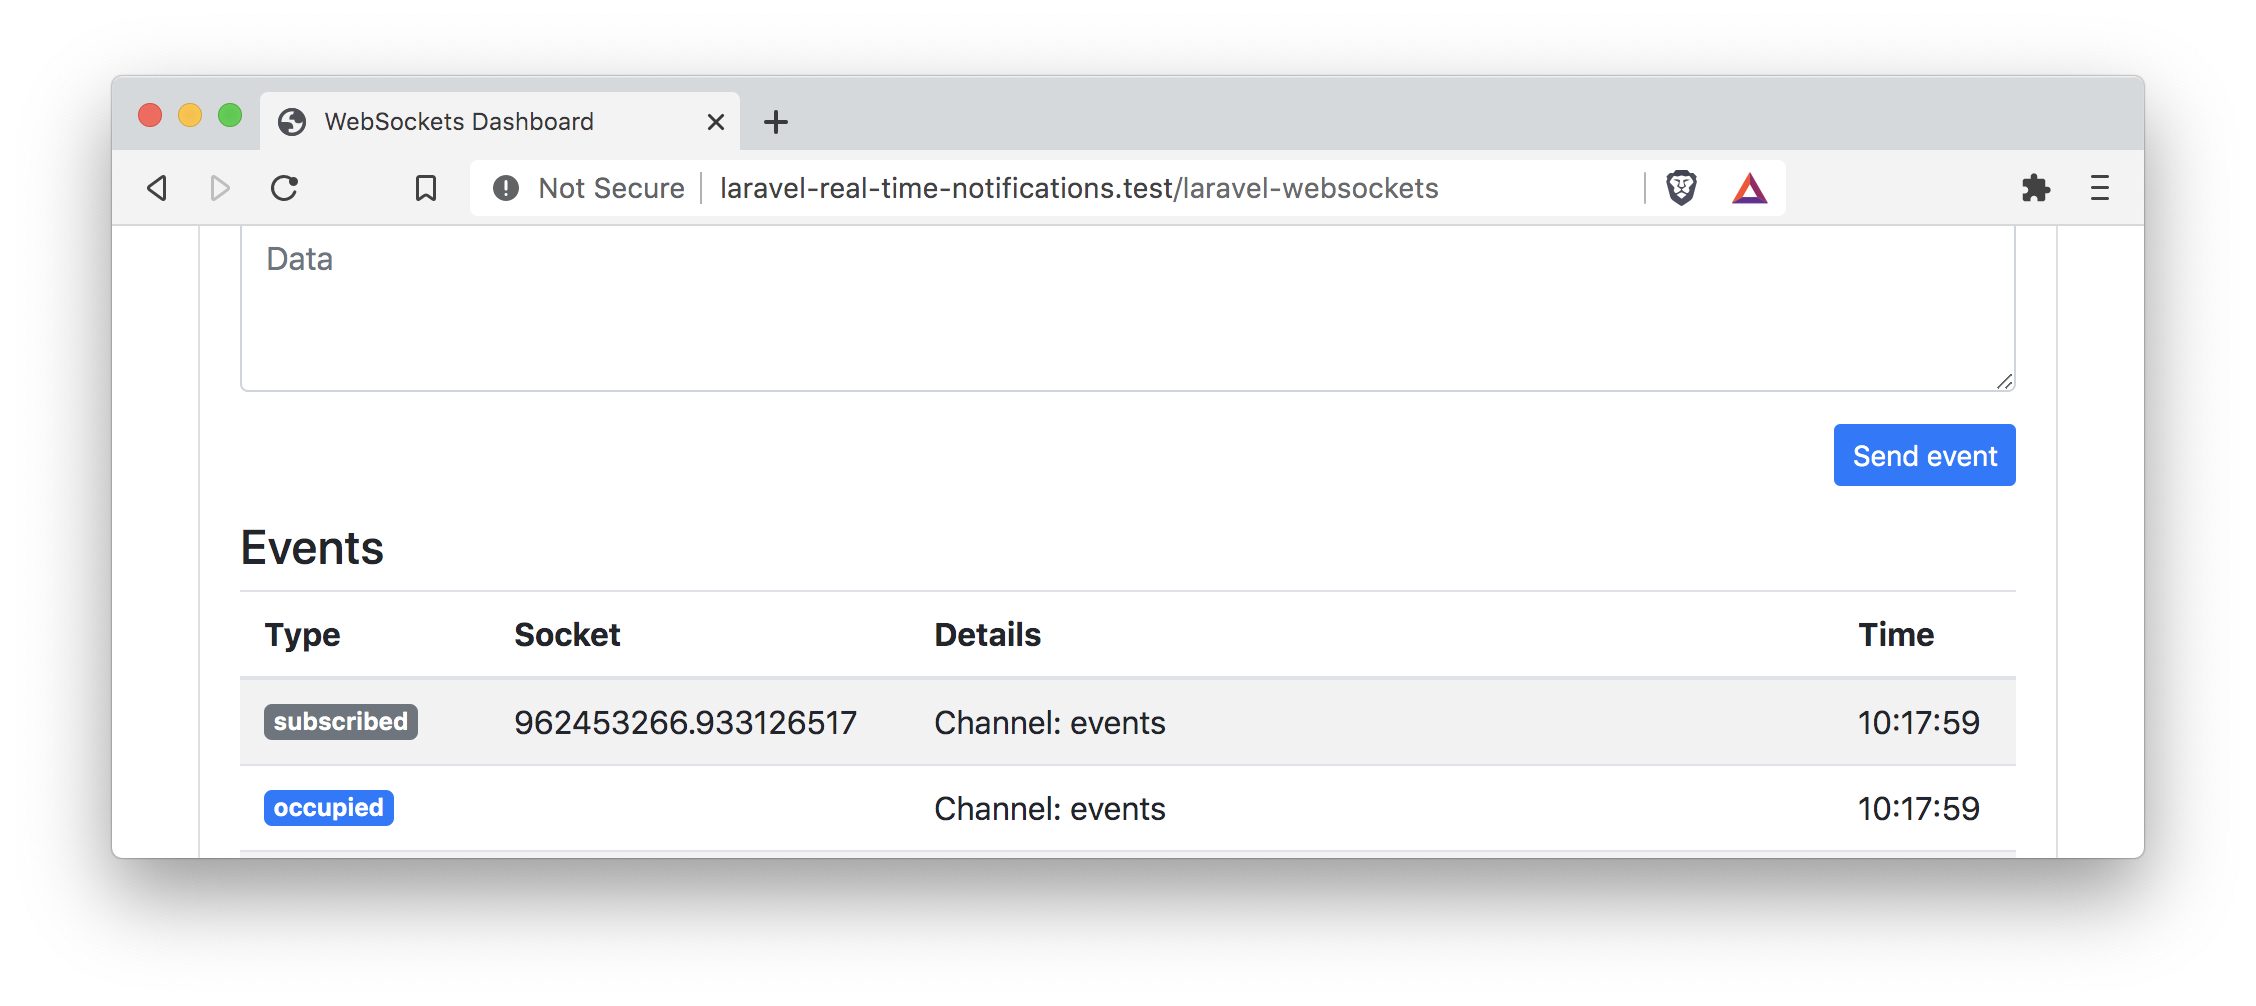
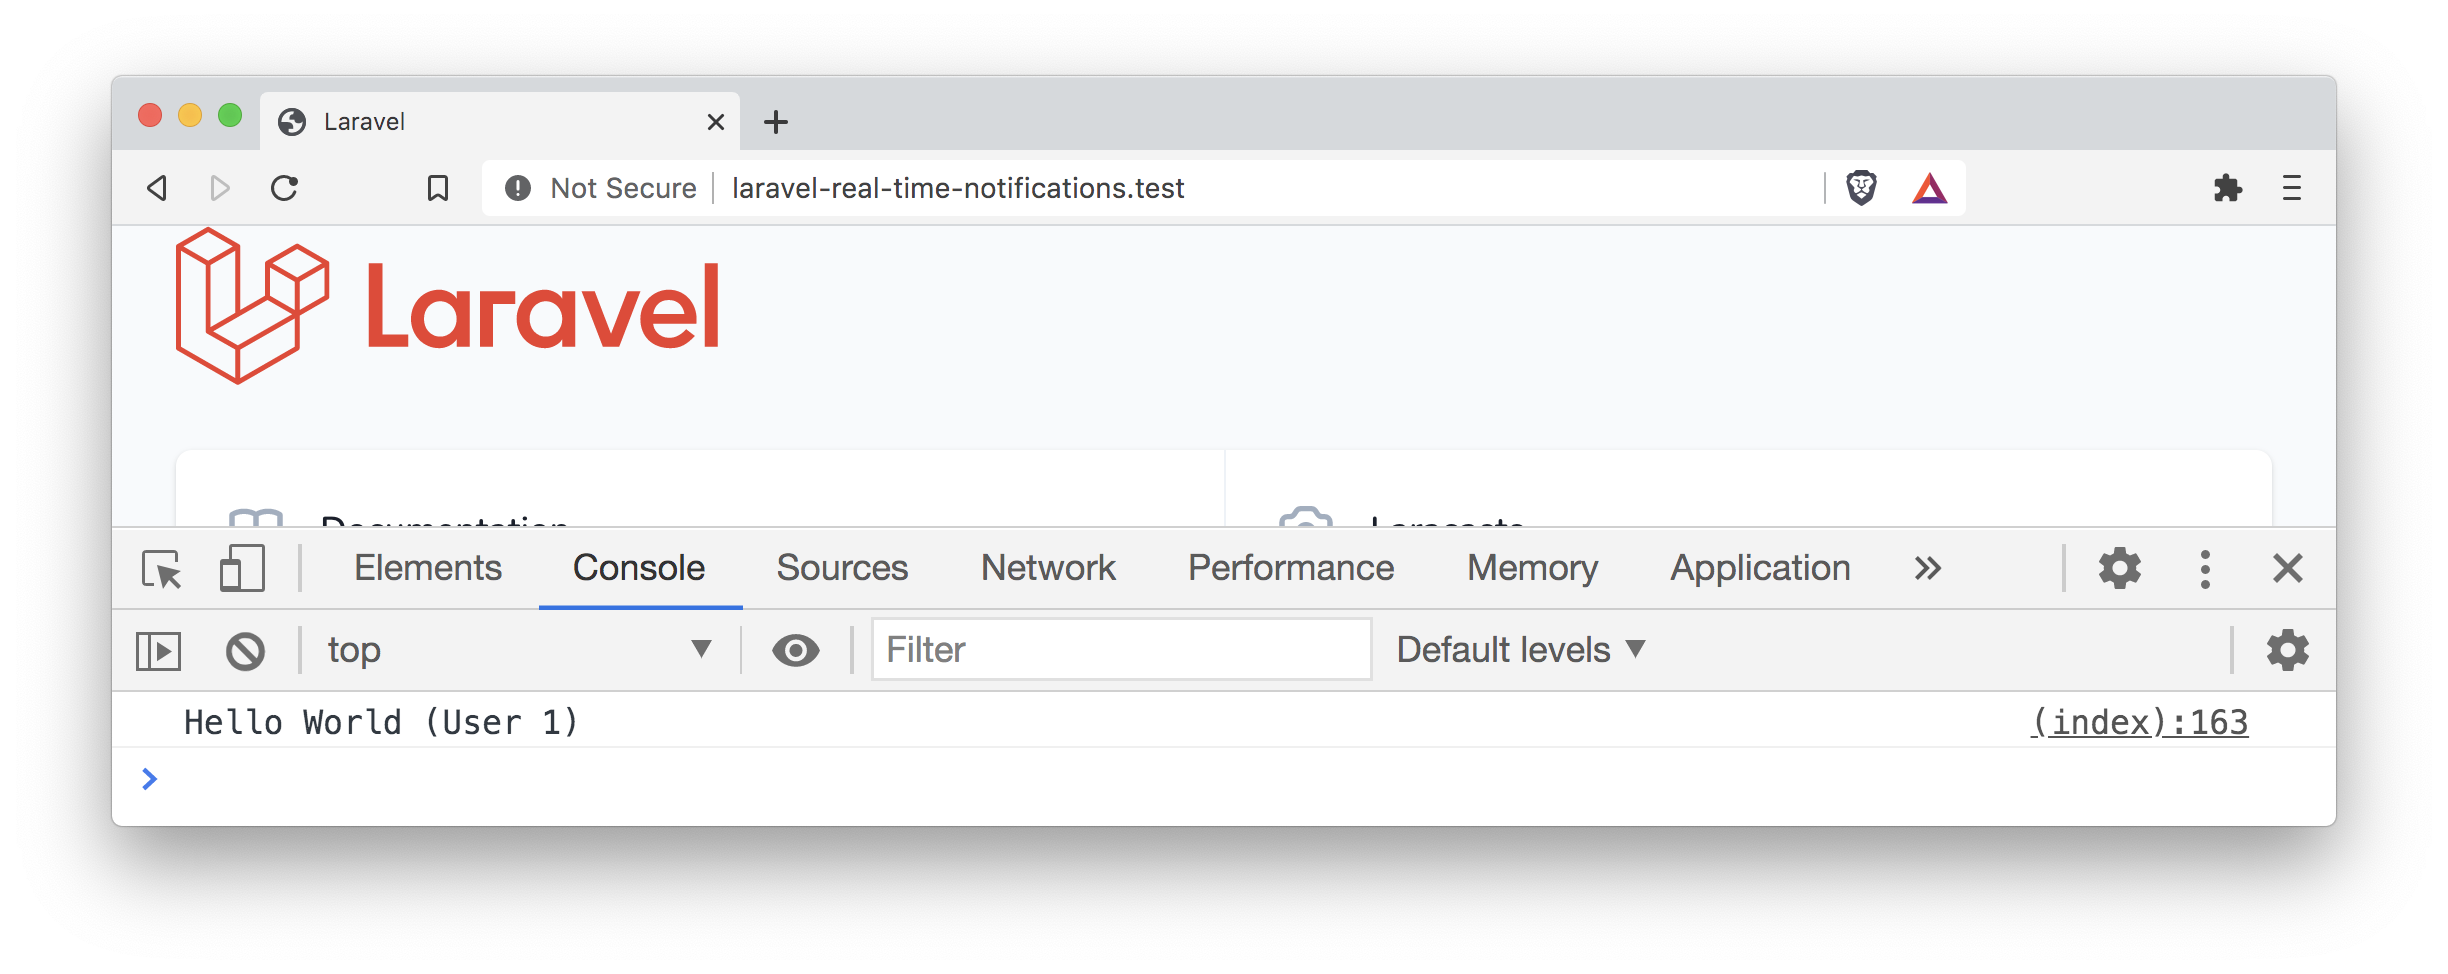
This will log in the first user from our users table. Reload the welcome page, and you will no longer find an error in the console. You will also see that we are now subscribed to the private events channel in the debug dashboard.
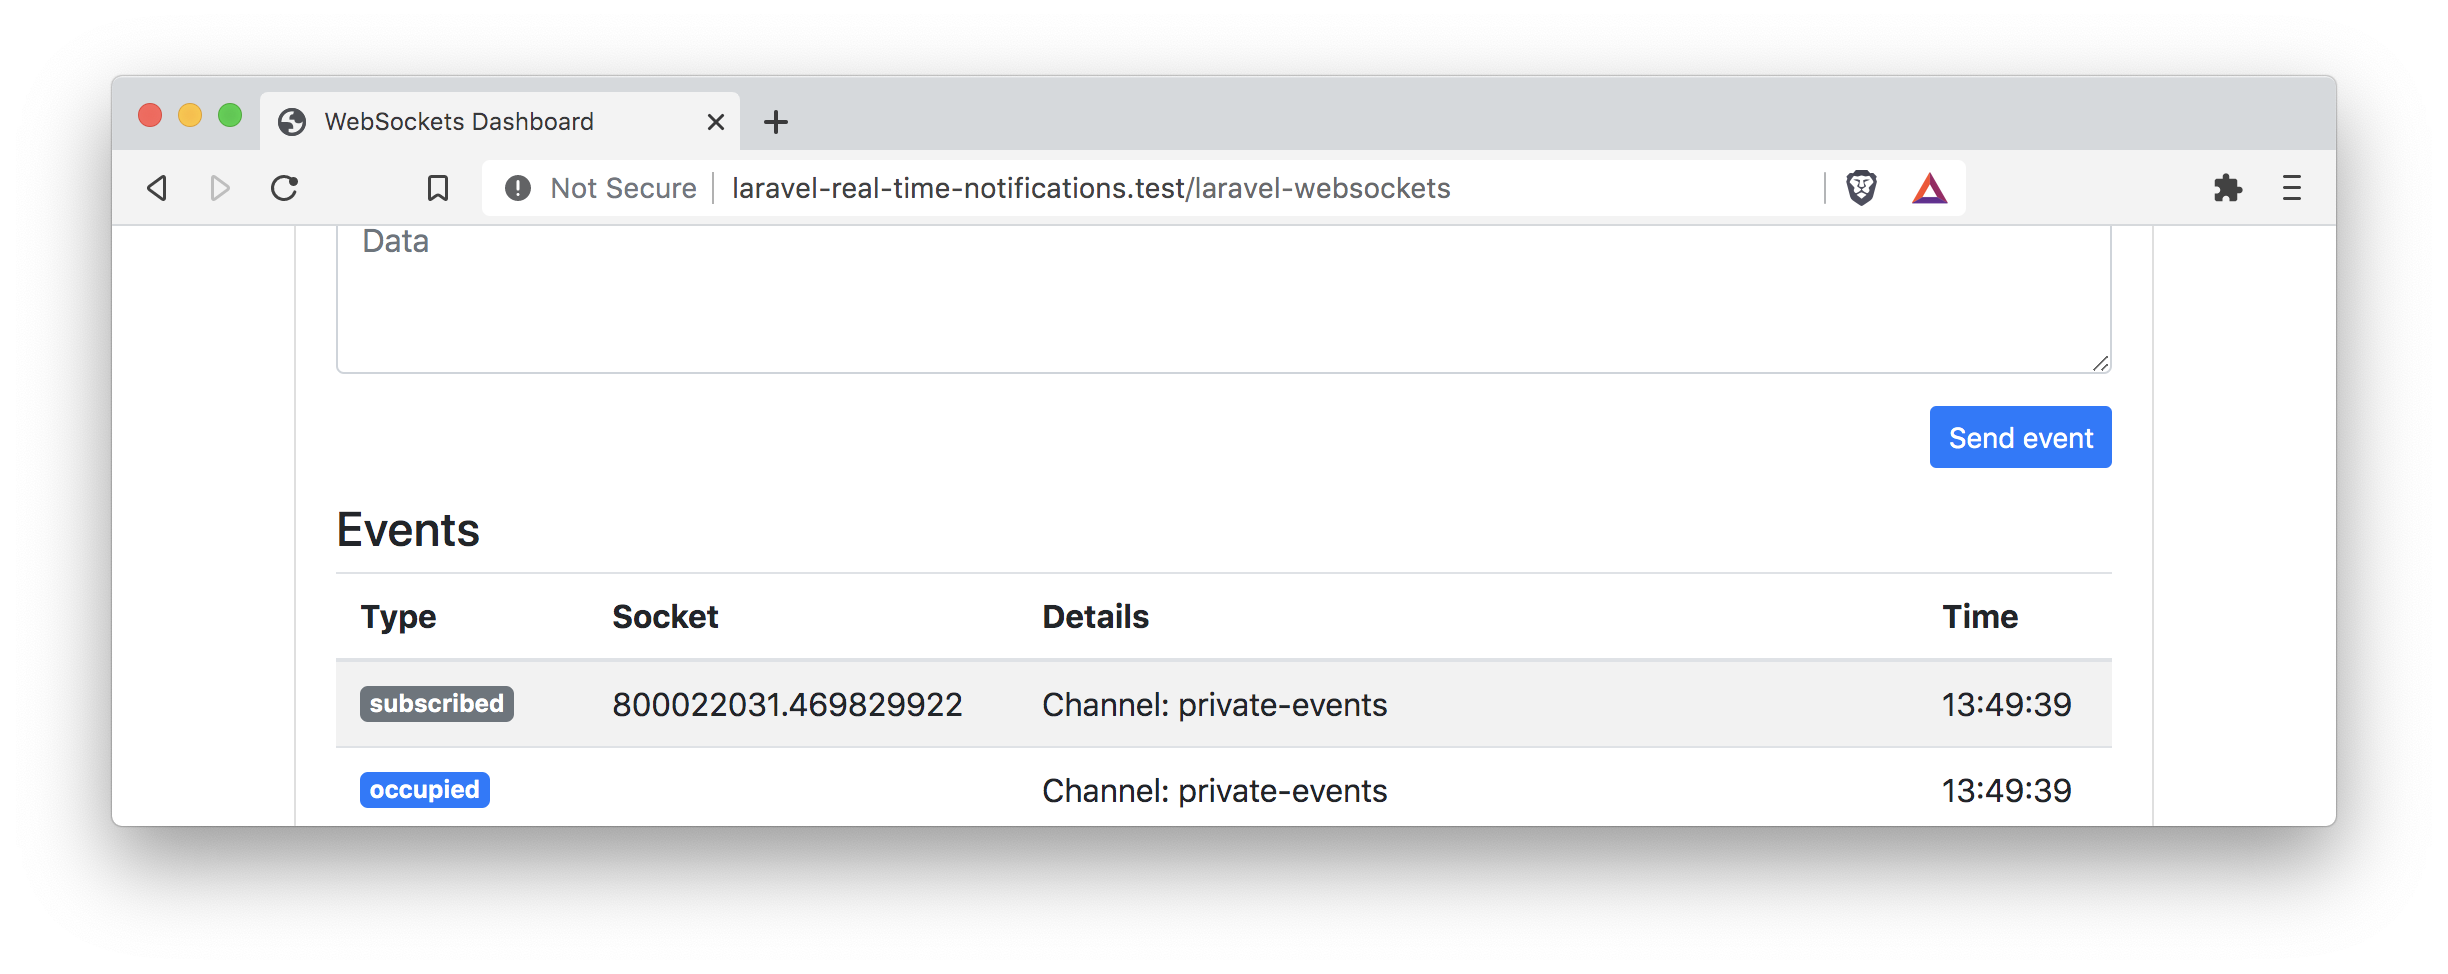
Trigger the event once again, and we will receive the private message output in the console.
event(new App\Events\RealTimeMessage('Hello World'));

Notifications
php artisan make:notification RealTimeNotification
Here is what we need to change:
- use the ShouldBroadcast interface
- add a message property which we will pass through the constructor
- use the broadcast channel in the via method
- add a toBroadcast method to define the message
					<?php

namespace App\Notifications;

use Illuminate\Contracts\Broadcasting\ShouldBroadcast;
use Illuminate\Notifications\Messages\BroadcastMessage;
use Illuminate\Notifications\Notification;

class RealTimeNotification extends Notification implements ShouldBroadcast
{

    public string $message;

    public function __construct(string $message)
    {
        $this->message = $message;
    }

    public function via($notifiable): array
    {
        return ['broadcast'];
    }

    public function toBroadcast($notifiable): BroadcastMessage
    {
        return new BroadcastMessage([
            'message' => "$this->message (User $notifiable->id)"
        ]);
    }
}
					$user = User::first();

$user->notify(new App\Notifications\RealTimeNotification('Hello World'));
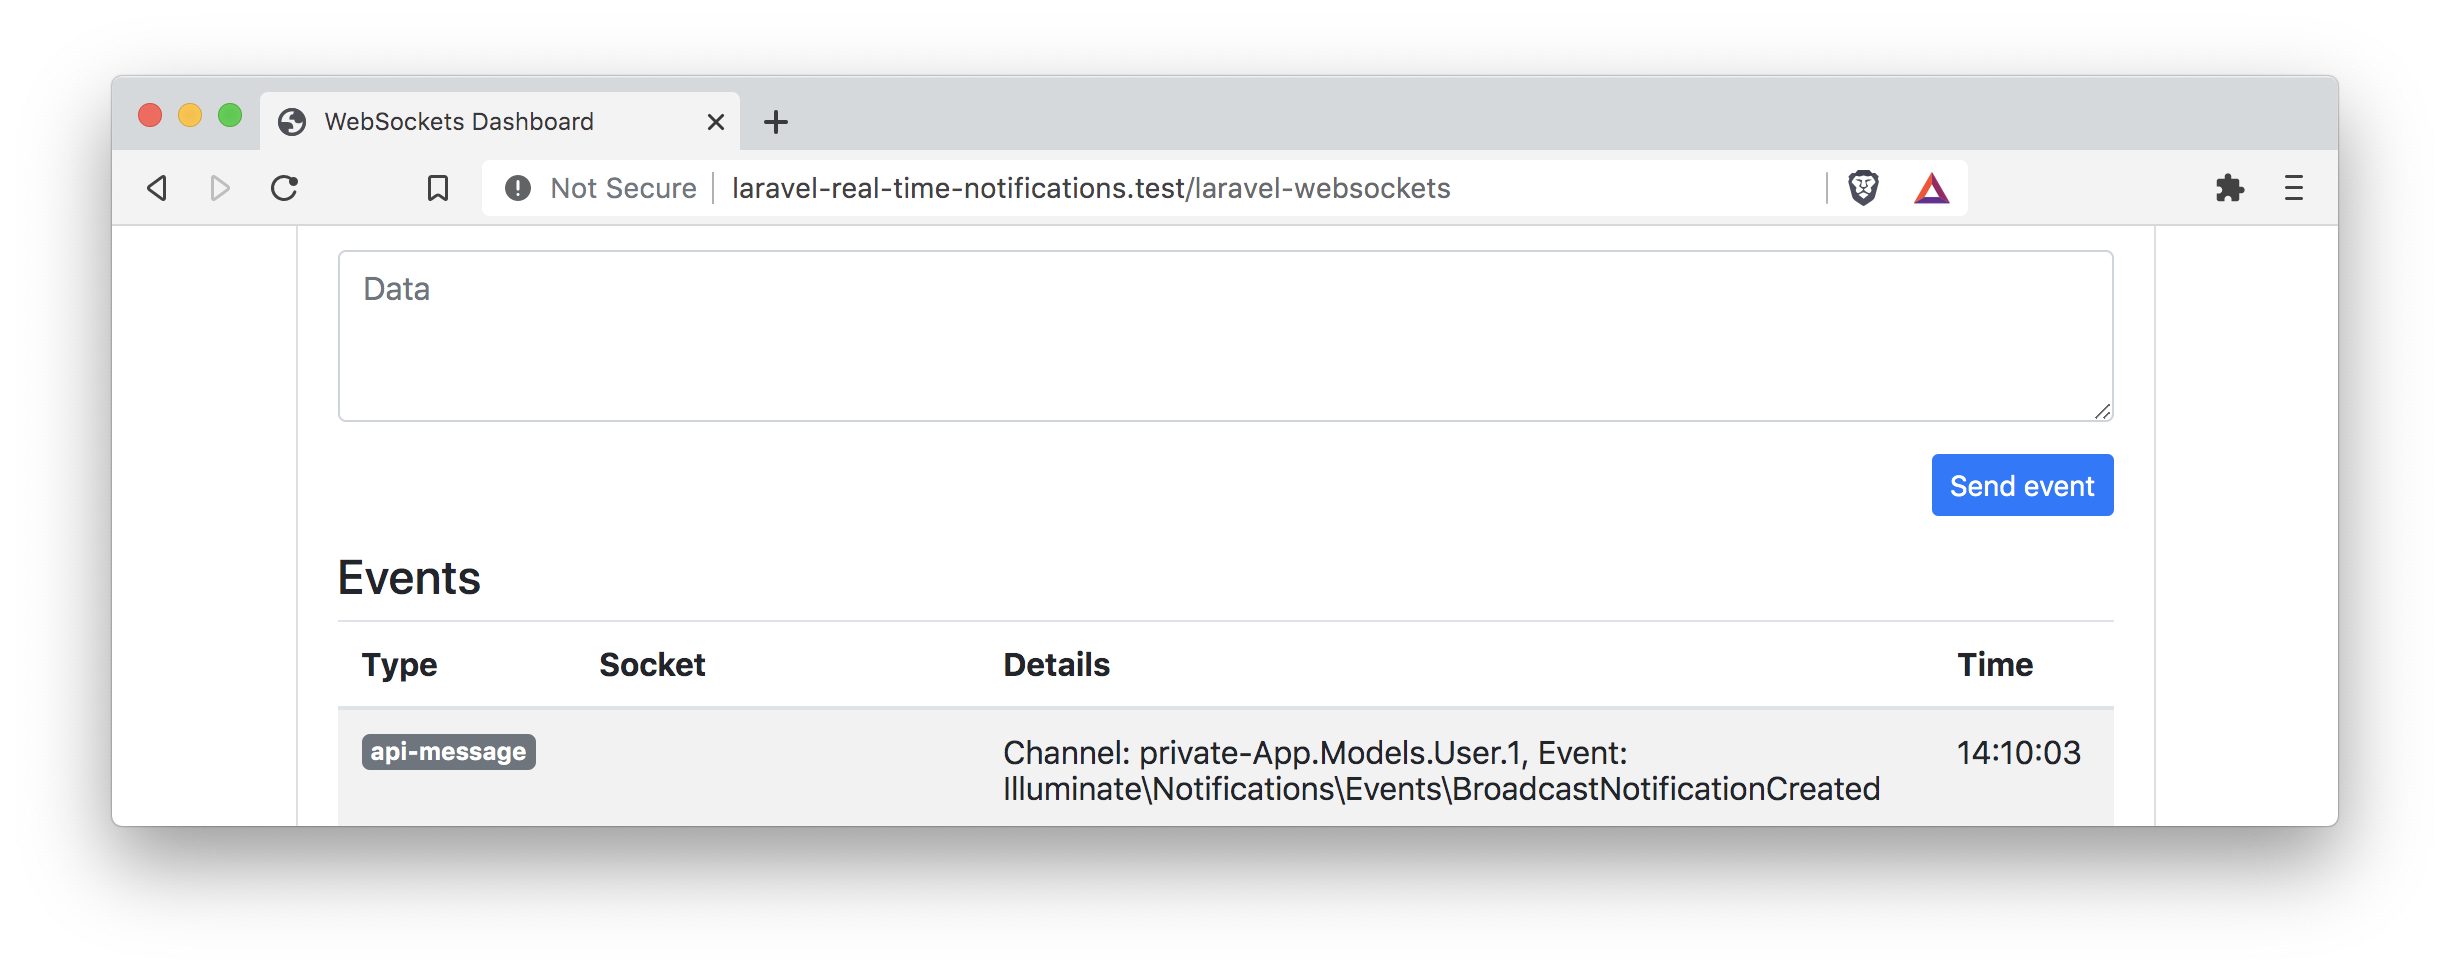
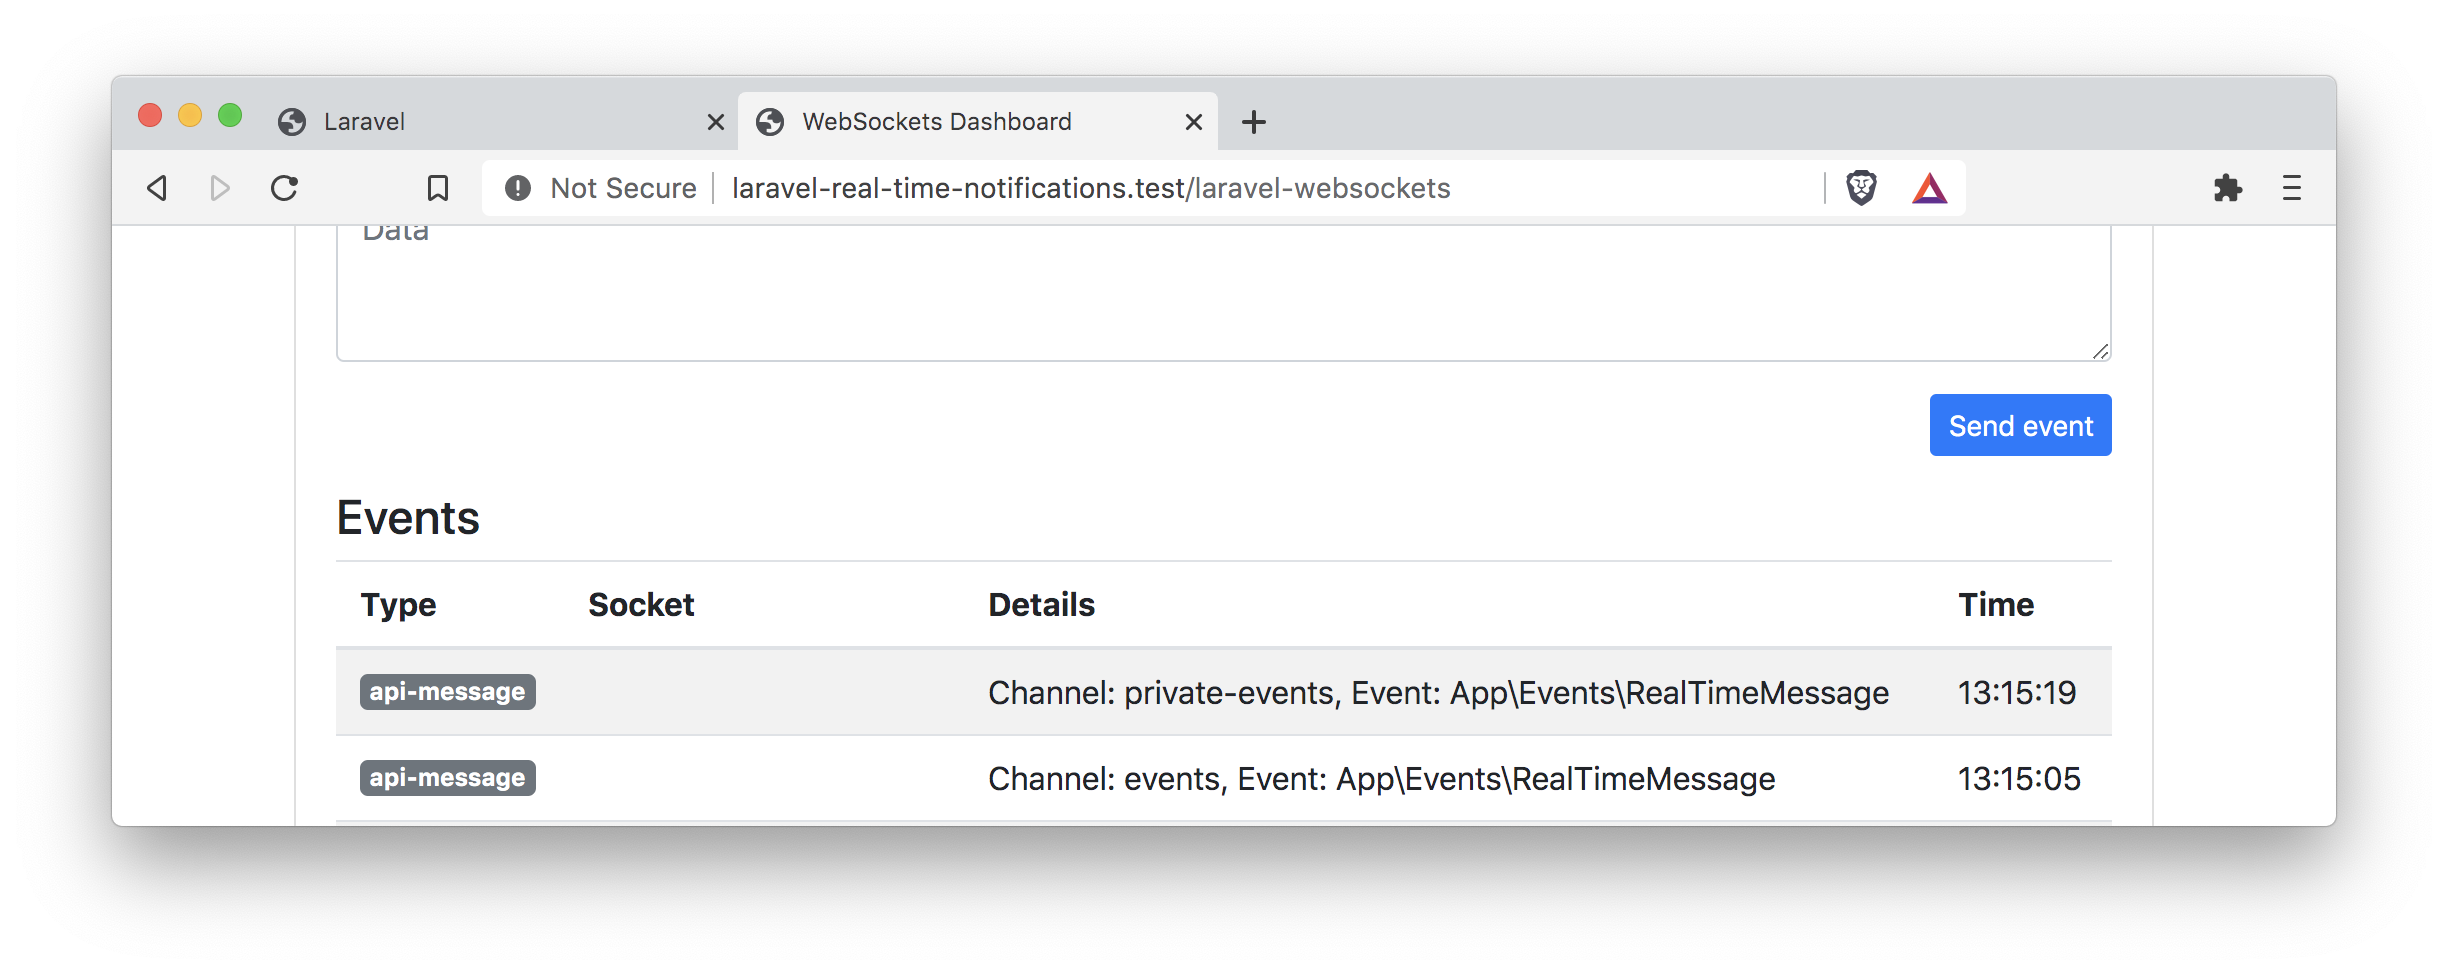
You probably noticed that we did not define a channel name with our notification as we did in our event. This is because there is a default pattern for the channel name of a notification notifiable-class.key. In our case, this would be App.Models.User.1. And when you take a look at the Web dashboard, you find a message triggered by our notification to the channel Channel: private-App.Models.User.1.
Next, let’s subscribe to this channel in our front-end. Laravel echo has a notification method we can make use of.
					Echo.private('App.Models.User.1')
    .notification((notification) => {
        console.log(notification.message);
    });
					Broadcast::channel('App.Models.User.{id}', function ($user, $id) {
    return (int) $user->id === (int) $id;
});
					Echo.private('App.Models.User.99')
    .notification((notification) => {
        console.log(notification.message);
    });
Conclusion
I hope this long article could give you a great start into real-time messaging with Laravel.